Showing posts with label french script. Show all posts

Sunday, June 23, 2013

Kitchen Wall Tutorial

As promised I am sharing a tutorial with you on how I did my kitchen wall in the previous post and as usual I did not think to take a photo of all the supplies needed...so here is a list:

1. white tissue paper
2. assorted rubber stamps
3. black rubber stamp ink pad
4. paint
5. paint brushes
6. wall sizing
7. old rags
8. ladder {just don't miss the last step on your ladder and fall off like I did a couple
times...I have the bruises to prove it. ha!}
9..the will to actually take the time to get this project done


First, I took several pieces of white tissue paper and stamped the images on them that I had chosen.( I stamped them on the dull side of the paper and not the shiny)


This is what mine looked like and no two were alike believe me. That is the beauty of this project...you can't mess it up no matter how hard you try. 


After stamping several sheets I ripped them in four strips and then ripped the strips into pieces. All sizes and all shapes. Every now and then I would run out of pieces so had to get more tissue paper out and stamp, stamp, stamp. :) I also made sure and ripped off all the straight edges that were along the outside of the paper.

Next, I added some drizzle gray paint to the walls ...Ceramacoat brand . I used it out of a 2 ounce bottle and I still have a lot left. {the walls were already primed with rustoleum white painters touch paint, but I would call it a light gray instead of white} I just squirted a little on my paintbrush like the photo above shows.|


Then I smeared the paint on the wall. There is no right or wrong way to do this at all. Just slap some paint on your wall.
As you can see this shade is a  tad bit darker than the previous shade that is painted on the wall.


Next, I took a wet rag and wiped it in swirly motions to spread the paint around and to give it a "mottled" look.


The above photo is what it looked like when I was done. Again, you can't mess this up! A lot of this will be covered by the tissue paper pieces, so a little of the darker paint will show up between the pieces and it will be just perfect.


After smearing the wall with the darker paint {confession time here...I did small areas of the wall as I went along} I mixed up some wall sizing {you can find this in the wallpaper section of a home improvement store} and painted a little on the wall where I was going to attach one of the tissue paper pieces.


Then I took a piece of stamped tissue paper and put it on the wall.


Like the photo above...it does not matter if it has a few bubbles, but mine rarely did.


With the paper being so thin, you can dab the bubbles out with a dry brush or...


...with your finger...this part may seem a tad daunting but it is not. I didn't rip one piece of paper while doing this. It went up so fast and so smooth.

I will say also that if you get a piece up that you don't like or if part of it messes up just take a dry paper towel and carefully wipe it of the wall.  Being thin tissue paper, it will ball up and come right off.


This will be your finished project!! 


I really do love how it turned out. Up close it literally looks like old stone and with the applied paper being so thin, it just looks like part of the wall.  My son and daughter-in-law came over a day or so after I finished this up. As soon as they walked in the kitchen they noticed the wall right away and went right over to it. My son could not believe it was tissue paper because it seriously looks and even feels like a stone surface! {I am sure it helped that I have old uneven walls to start with lol}  He kept saying, "NO, it is not tissue paper....NOPE it can't be"...lol. 


I haven't sealed it. Still thinking that over. I am not sure if it would smear the stamped part or not. Probably not because I used archival ink , but I am not sure. Will have to test it first on a piece that isn't on the wall. I hope some of you give this a try and if you do please let me know how yours turned out. I did get a new window treatment partially finished so will show you that next. I do love simple projects even though this one took a few days. What can I start next...hmm...:)

Happy Sunday!!

Wednesday, April 18, 2012

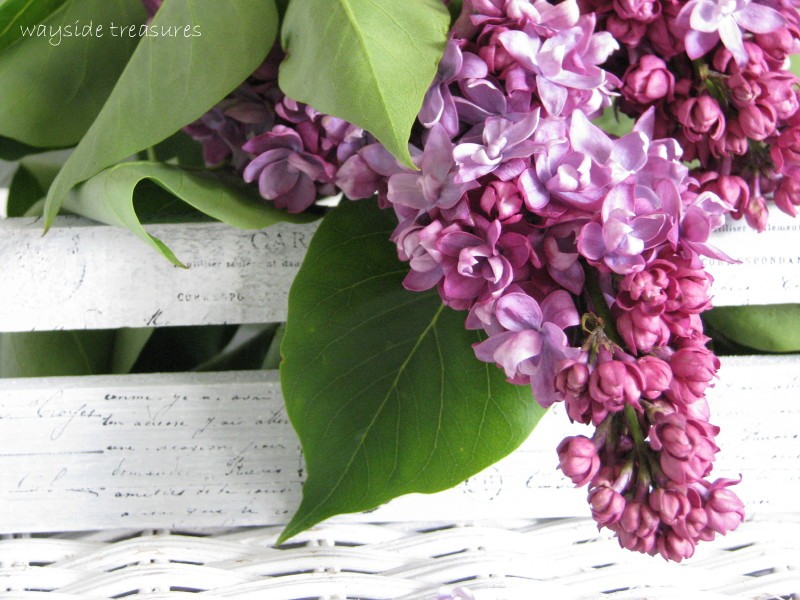
Mini crate makeover

I found this cute little crate at the Goodwill and while it is not from France I still thought
it would be cute fixed up. It started out a grayish/ blue color and it just didn't do anything
for me so I gave it a light gray/white paint makeover and then rubber stamped it with a script
design. I do like it much better this way. :)

I grabbed a handful of lilacs yesterday and brought them inside to showcase the mini crate.

This little crate can be such a versatile piece. It can be used for flowers or you can put glassware in
it, drinks, silverware etc. The sky is the limit. { I was too lazy to put any actual food or drink in today}

I found six of these glass pieces at the Goodwill the last time I was there. They are marked
 Ikea and made in Italy on the bottom. I paid 55 cents each so I think I got a bargain. :)


I so want some white lilacs and we did plant a bush about two or three years ago, but so
far no flowers. This year it looks like it MIGHT have one flower on it. I sure hope
 it flowers more next year.


I hope you enjoyed my lilacs today. Can't you just smell them? I went out on the back porch
this morning and was hit with their fragrance as soon as I opened the door. Scrumptious!!

Linking up with White Wednesday over at Faded Charm today.

Wednesday, March 28, 2012

Gifts and creations


I thought I was done showing birthday gifts, but above is another one that my kids bestowed upon me.
A french script ottoman ~
Of course I LOVE IT!  {birthday was 3/10 and it just seems to keep on going, but I think we are
finally done with the gifts. lol}

I have told you before that most times when I watch tv with hubby I can't just sit there and
do nothing. A few nights ago I hauled out the coffee filters again and made these flowers.
Most of it is coffee filters, but then I plopped a fake rose in the center. It just seems to
fit and it hides the center of the filter. I haven't a clue how I will use these, but maybe for
some of the fairy party decor? Time will tell. I also thought about hanging them from ribbon.

More fake roses leftover so I made a wreath as well. These flowers have been around the block so
to speak. We used them for my daughters wedding in 2003 and have since used them in centerpieces
and all kinds of decor. It was time to do something different with them. Again...will probably hang this
somewhere for the fairy party or it may end up at the Goodwill!! :) 

Do you see my new sign?? I LOVE this too. Another gift {from me to me. lol} I had some
money saved up for this and finally made the decision to purchase it. It takes me awhile to
let go of saved funds, but I am glad I purchased this. Paula from Castle and Cottage made
it and she did a wonderful job!!
{I need to figure out a way to hide that obnoxious thermostat. :}


When I was roaming around in my picture file I came across this photo of stars that I made back
before Christmas last year. These are so fun to make...well sometimes frustrating , but most of the
time fun. You can really get some wonky looking stars if you don't fold the paper just right. :)
Love how most of them turned out though.
{You start by folding strips of paper over and over and then push in the sides to make the
 stars puff up. Very easy technique}

My inspiration board made over for spring.

Happy White Wednesday to all my friends in blogland. I am getting to the place where I don't know if it is
fair for me to "play" on WW since my slow internet makes it impossible to visit very many people, but for
today at least I played along again. Enjoy your day!!

Tuesday, March 15, 2011

Beautiful lampshades

I have been overwhelmed this week watching
the sad story coming out of Japan. Those
people certainly need our prayers during
this difficult time. I can't even begin to
imagine what many of them are going
through.

I am still sneezing , coughing and all that goes
along with it so I am not getting much
accomplished here this week. With that in mind , I decided to snap a few
pictures of some of my favorite lamps.

This is one of the lamps in my bedroom. The lace is a vintage collar. I just slipped
it over the lamp and it fit perfect.
{Now I am noticing the dark finial...I think
I need to get out the white paint}

I added a rosette made by yours truly and love
the simple look.

This lamp is a favorite. Right now it is in my
studio until I decide for sure where I do
want to put it. Maybe it will stay in there.
I found it at Home Goods several
weeks ago and did not purchase it.
Then the last time I was there...it became
mine. How can you beat 39.99 for such
a gorgeous lamp with this script shade?
I couldn't! :)

I have shown you this shade before. It came on
the antique figural lamp and I love it.

I saw this neat idea when we went to Shipshewana
so I made sure to get a photo of it.
Lace around the middle of them lamp and
then a handmade rubber stamped flower. Gorgeous!

Oops...I think my shade is crooked. Oh well,
I also purchased this lamp at Home Goods a
few years ago. It was upstairs in the guest bedroom
which is hardly ever used so I brought it down
and put it in my dining room. Love the
blousy fabric...it reminds me of a wedding dress.
I also added a Meadowstreet rose.

I will be linking up with Kathleen over at
Faded Charm again this week for White
Wednesday.
Thank you Kathleen for continuing to host!! Blessings~

Thursday, February 3, 2011

Glittered hearts for sale!

I have some glittered hearts left over from when I was
playing with paper the other day and Tracie suggested I sell
some so I am listing a few in my Etsy store.
These measure approx. 2.5 inches across at the widest part.
These pretties can be used just to add to displays or punch
a hole in them and hang with ribbon, make a mobile, a
garland, include in a Valentine card etc. etc.

They are available in my Etsy shop now.
(If they sell out in my Etsy just email me and let me know
and I will add more or directly invoice you through
paypal) I can also make them without glitter or also
with different designs on both sides.

Thank you !! Blessings~

Monday, April 5, 2010

Jeanne d' Arc Living Eggs

Remember last week or maybe even the week before
when I told you I was creating some eggs...
I wanted to make them on the order of the
Jeanne d' Arc Living Magazine pictures.

This is as far as I got. I purchased the paper mache eggs,
covered them with pieces of french book pages,
and glued vintage lace around the middle.
I had good intentions to do more, but
time got away from me.

This is my sweet granddaughter Allysha holding them for me.

I have to tell you that when we had the Easter egg hunt yesterday, {pictures on post below} I looked inside the window and Jon was holding these eggs! He thought these were the ones they were hunting for. lol My daughter-in-law came to the rescue and put them up for me. Oh the innocence of small children!

Happy Monday everyone!! Blessings~